
Create a project in WorkSkedge
Short answer
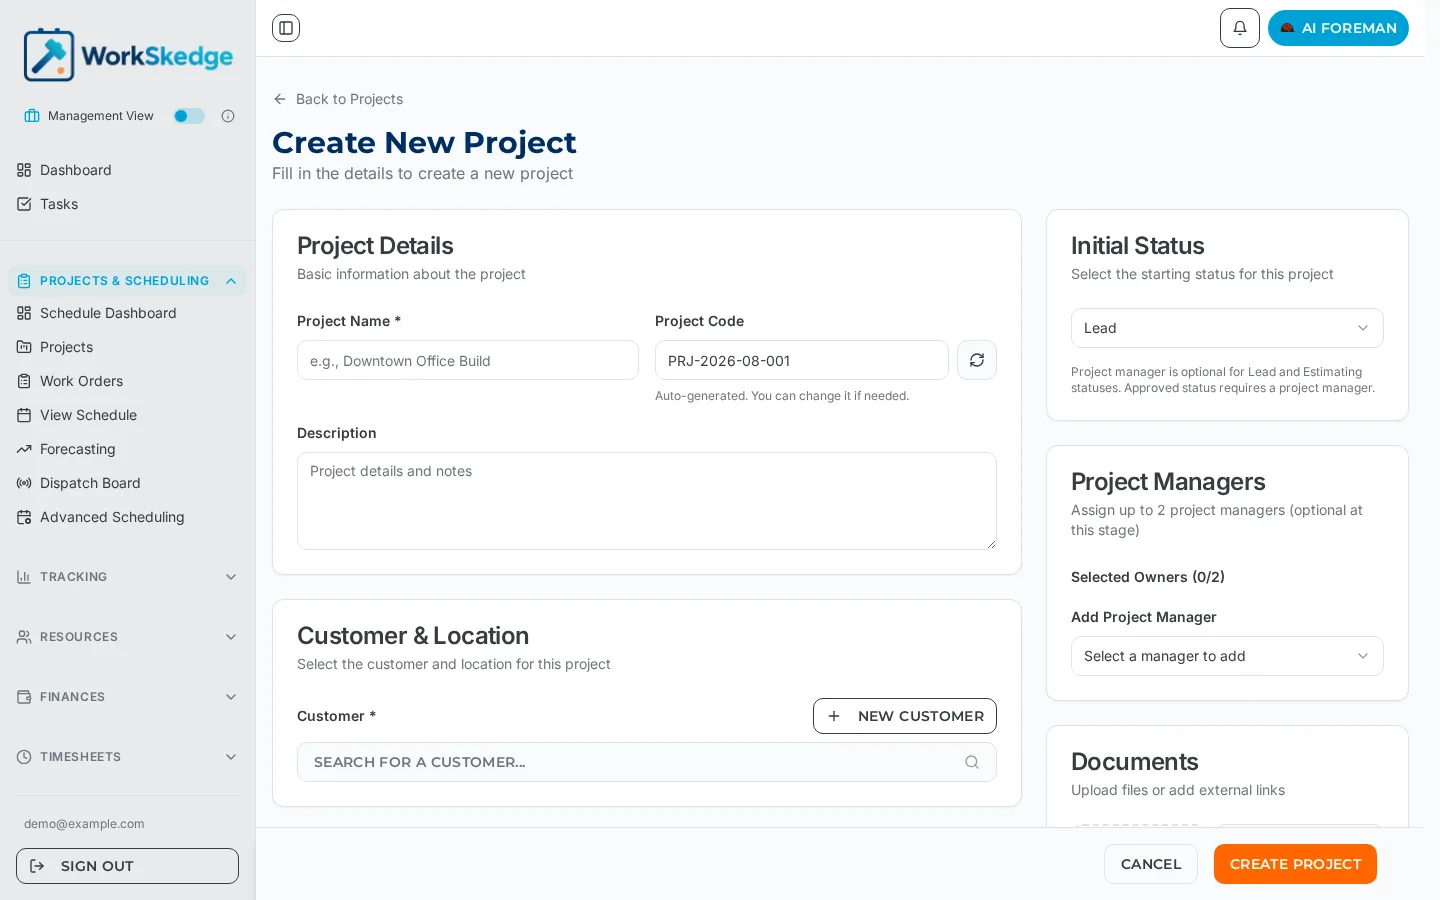
Projects are created from Projects > Add Project. Only the project name and customer are required — everything else (code, job address, initial status, project managers, documents) can be filled in on the same screen or added later.
On this page
Before you start
You need a customer record. If the customer does not exist yet, use New Customer directly inside the Create New Project screen instead of leaving the page.
Steps
- 1Go to Projects & Scheduling > Projects.
- 2Click Add Project to open the Create New Project screen.
- 3Enter the Project Name and keep or overwrite the auto-generated Project Code.
- 4Select the customer, or click New Customer to create one without leaving the page.
- 5Set the job site address, or leave it as the customer location.
- 6Choose the initial status: Lead, Estimating or Approved.
- 7Add up to two project managers (required if you chose Approved).
- 8Attach documents or links if you have them.
- 9Click Create Project.
What the form asks for
- Project Details — Project Name (required) and Project Code. The code is auto-generated in the format
PRJ-YYYY-MM-000; you can overwrite it with your own numbering. Description is free text for scope notes. - Customer & Location — the customer is required. The Job Site Address defaults to the customer location; set a separate job address when crews are working somewhere other than the customer's billing address.
- Initial Status — Lead, Estimating or Approved. A project manager is optional for Lead and Estimating, but Approved requires a project manager.
- Project Managers — up to two owners per project. Owners drive the "Projects by Owner" dashboard widget.
- Documents — upload files or add external links (for example a shared drive folder) while you are creating the project.
Pick the right initial status
Start at Lead if the job is still a sales conversation, Estimating while you are pricing it, and Approved only when the customer has agreed and you are ready to schedule work. Work orders can only be created on approved or active projects, so choosing Approved on day one is correct for jobs that are already sold.
After the project is created
Open the project to reach its tabs — Overview, Work Orders, Reports, Finances, Documents and Activity. Finish setup (contacts, POs, internal notes) before you create the first work order, because work orders inherit the project's customer and location.
Troubleshooting
"Project code already exists". Project codes must be unique within your company. Use sequential numbering or a date-based code, and check the existing projects list for the conflict.
"Cannot edit project". Closed projects are locked. Reopen the project, and confirm your role allows project edits — managers and administrators can edit, other roles may not.
Templates are not loading. Only active templates for your company appear in the picker. If the list is empty, check that the template exists and is still marked active.
Custom fields are not saving. The field definition has to exist before a value can be stored, and the value must match the field type (for example a number field will not accept text).
Frequently asked questions
Is the project code required?
No. WorkSkedge auto-generates a code in the PRJ-YYYY-MM-000 format when you open the form. You can replace it with your own numbering scheme before saving.
Do I have to assign a project manager?
Only if the initial status is Approved. Lead and Estimating projects can be saved without an owner, but you should add one before work is scheduled so the project shows up under Projects by Owner.
Can I create the customer while creating the project?
Yes. The Customer & Location card has a New Customer button so you do not have to abandon the form.
What if the crew works at a different address than the customer?
Set a separate Job Site Address on the project. Work orders and schedules inherit that address, so the field team is routed to the right site.
Was this article helpful?
Still stuck?
Send us the article name and what you expected to happen.
Last verified September 1, 2026